
How to Complete KYB Verification
Before you start
KYB (Know Your Business) verification confirms who you are and what your business does before you can process payments. Have your identity documents and basic business information ready — the exact documents you'll be asked for depend on your business type and category, which you'll select in the first step.
Steps
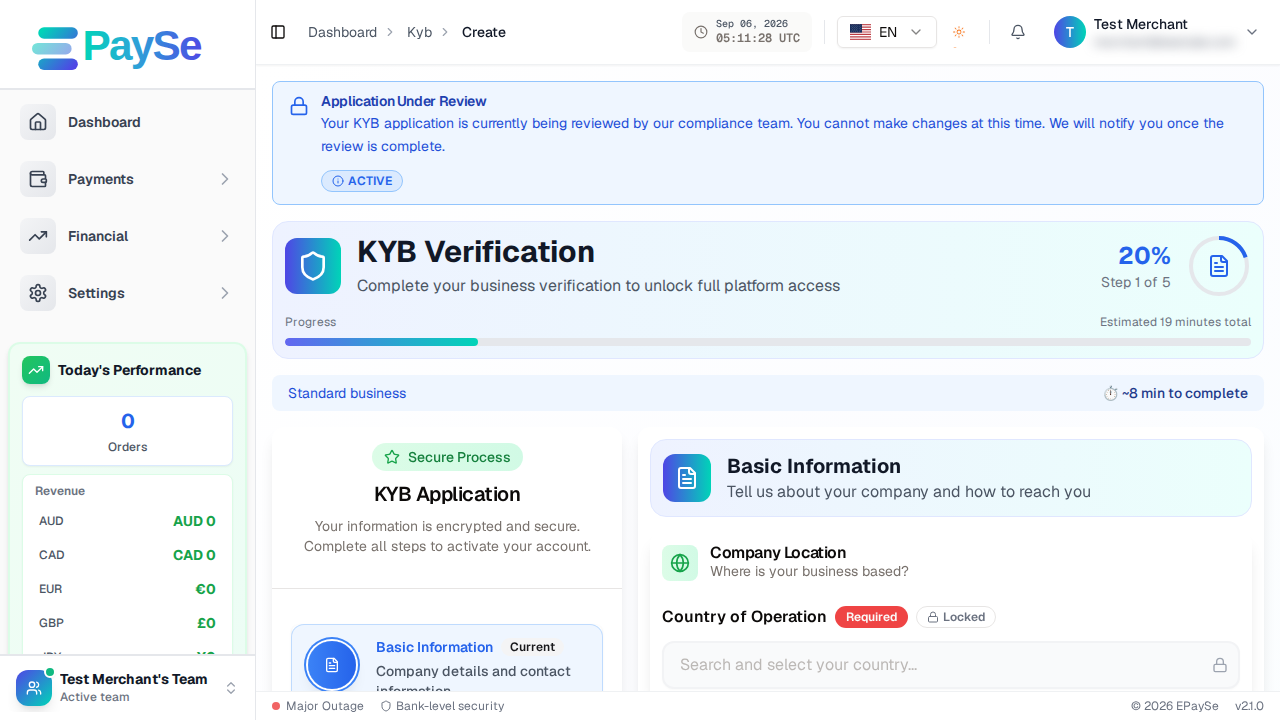
- Basic Information — enter your business's core details, then select your entity type (Individual, Sole Proprietorship, Partnership, Company, or Other) and your business category. These two choices determine which documents you'll be asked to upload later, so pick the ones that actually match your business.
- Who's Involved — enter details for your business's representative and, depending on your entity type, any additional owners. An Individual or Sole Proprietorship submission keeps this simple: you're both the representative and the sole owner. A Company or Partnership submission asks for each owner's details and ownership share.
- Your Business — provide additional business details relevant to your entity type and category.
- Documents — upload the identity and business documents requested. The exact list is tailored to what you selected in Step 1.
- Review & Submit — review everything you've entered, then click Submit KYB Application.
Saving your progress
You don't have to finish in one sitting. If you need to stop partway through, click "Email me a resume link" — you'll receive an email with a link that brings you straight back to where you left off, with your progress saved.
After you submit

Track your submission's status from Settings → KYB Status. You'll see which step your application is at and can view or edit the details you submitted.
If you get stuck
- Make sure every required field on the current step is filled in before continuing — the form will point out what's missing.
- If a document upload fails, check the file type and size are supported.
- If you're not sure which entity type or category applies to your business, contact support before submitting — changing it later means redoing later steps.
Related Articles
How to View Your Customers
How to view and export your customer directory from your EPaySe merchant dashboard.
How to View and Export Transactions
How to search, filter, and export your transaction history from the EPaySe merchant dashboard.
How to Use the Action Required Queue
How to review and act on items in your EPaySe Action Required queue.
How to Upload Evidence for a Dispute
How to add evidence to an open dispute from your EPaySe merchant dashboard, and what to know about evidence types and the upload deadline.